I'm glad to see you are still with me because now it gets interesting. Shading... Yes shading. So, the first thing you want to do is select your top most layer and then create a new adjustment layer by clicking the right arrow at the top of the layer tab: choose Brightness/Contrast click ok, and then set both contrast and brightness to -50 this should darken the image quite a bit.


see that little arrow at the top?

Now the way an adjustment layer works is, drawing on an adjustment layer with black will "cut" away at the darkness and reveal the white underneath. If you use a grey it will show a lighter area but not as light as flat black, try it out a bit and see what I mean.


that's one coloured in telescope!

Now do the same for the other objects. Make a new layer called Trees and select the tree tops and fill them with a colour, then do the same with the trunks. Another new layer called Ground, fill in the grass, and then the cliff face. I also changed the white backround to a sky blue and renamed the layer Sky.

Now just give it a once over and hunt for some stray pixels that didn't get coloured. There are a few in the trees and one at the top of the telescope. Just select the right layer and by pressing ALT when in pencil mode will give you the eye dropper tool, so just select the colour and fill it in, no worries!

Now, how I procede from here on out is using a combination of the straight line lasso tool with anti-aliasing turned off and the pencil tool. I first lay down my second lightest colour by selecting the middle grey between pure white and pure black. This may be different on your pallette so just choose whatever colour you see as an average between the two.

So I use the straight line lasso tool to select areas of the telescope where the moon light would hit it, then I just fill in the selections with the grey and [taking care that I am working on the brightness/contrast layer] it should lighten the areas up a little bit.

The good thing also about using the lasso tool is that when you make a selection it can be over any part of the drawing. All you have to do is then choose the magic wand tool [with anti-alias turned off] and deselect the parts you don't want.


before


after


perfect!


Now I'm going to finish off laying down the initial light areas of the telescope. Also do the same for the landscape and the trees. Remember to follow the contours of the objects you are lighting so that they seem more three dimensional. Here is my picture with the first bit of light added. I did some touching up on the telescope and added the shadows of the trees to the base of the building. I am aware that the moon looks like crap, I couldn't draw a good one for some reason so we're going to have to make do with crap for now.
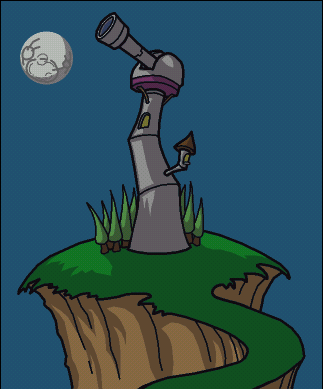
At this point I'm going to go through with adding the whitest whites to the picture by using the same method as before only with filling in with pure white. since this picture is a night image, don't use too much of the brightest colour or it will end up looking like mid-afternoon.
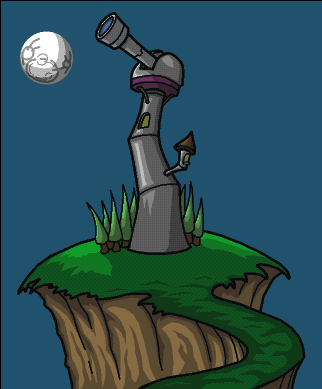

i lost the other image, so just pretend the dark darks
aren't there

This is what I ended up with. There weren't many places for me to add extreme light so I just put it on the trees and ground around the telescope and on the building it's self.

So far we have 3 shades of light and now we are going to add one more shade. So, make another adjustment layer and set brightness to -50 and contrast to -50. Your whole picture should be quite dark. Now fill in the entire layer black, this will get rid of all shadow on this layer. Because this layer is so dark, we will only use it in moderation. So, with your striaght line lasso tool or pencil tool, start making dark areas with the pure white colour.

I fiddled about adding shadows here and there and I changed the brightness and contrast of the newest layer we made to -35 and -35 because the other one was just too dark for my tastes. All that is left to do is add in the backround.


now pretend that that dark darks are back again

Ready to continue... next - back