|
Aloha all, eric here
with a lil tutorial for you. This lil' thing is all about
colouring and shading your work in Photoshop. I'm writing
this believing that you have some idea of your way around
Adobe Photoshop. I'm using 5.5 but I don't really use anything
fancy. Just lines and layers.
If you don't QUITE know
all the shortcuts than here are some you should know:

D - changes your selected
colours back to the default Black and White.
X - Swaps your selected
colours, foreground goes to backround and backround goes
to fore.
ALT +DELETE - fills the
layer or selection with the foreground colour.
CNTRL + DELETE - fills
the layer or selection with the backround colour.
[ and ] - change your
brush size.
ALT while using a drawing
tool - changes to the eye dropper for as long as you hold
ALT.
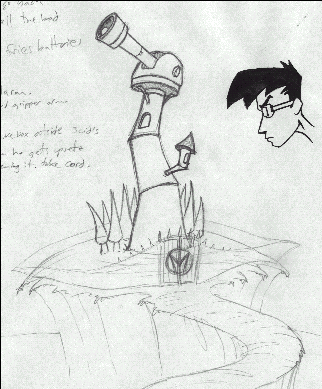
Before we
get to the computer part of it all, I start by drawing a
quick sketch of what I want. I don't draw it all perfect
or ruled out, I just draw. I try and keep my pencil lines
clean and don't erase too much. Here is the picture that
I'm working with and this is pretty much the same size that
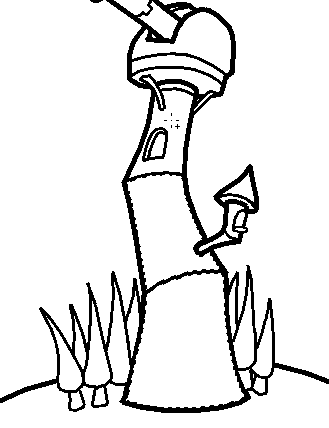
I drew it at. This is a night scene, there is going to be
a moon in the upper left casting light on the telescope
and ground. So we have a sketch, now I scanned this at 100dpi
mostly because I really don't need anything bigger than
that. It's best to scan the drawing bigger than it really
is so that you can add colour and detail easier. It's easier
to add detail to a big drawing and then reduce it than it
is to add it to a small drawing.
|